What Is A Split Squat? And How to Master It

When it comes to resistance training, it can sometimes feel like everyone’s only focused on the upper body. Sure, your arms and chest look pretty ripped. But if you forget about your lower body, you put yourself at risk for injury (and you might also just look a little top-heavy).
Leg exercises are essential for building muscle and toning, and having muscular legs is important. Lunges and calf raises are important, but the almighty squat is perhaps one of the most imperative as part of your routine.
Normal squats are great, but if you’re ready to kick things up a notch with a challenging variation, you’re ready to try a split squat. Here’s all you need to know to master one of the toughest lower body workouts.
How to Do (and Master) a Split Squat
You probably already know how to do a squat, but no shame if you need a refresher on some basic movements. A split squat works similar muscles, but it also focuses on your stability and increasing mobility while on one leg. It’s a perfect workout for athletes who spend a lot of time on one leg.
The ideal split squat involves having one leg raised off the ground, but that’s a tough movement to master right away. It’s important to start off slow and work your way towards the more advanced movements.
Baby Steps: Split Squat Isometric Hold
Before you actually start working on the dynamic movements involved in a split squat, it’s necessary to get your bearings and master the half-kneeling position that it requires.
Here’s what we’ll do:
- Place your left knee at a 90-degree angle directly under the hips and shoulders, basically just kneeling on the ground.
- Place your right knee at another 90-degree angle, but keep this one out in front of you for support.
- When you’ve obtained balance, use the muscles in your right leg to lift the left leg off the ground, maintaining that 90-degree angle. Drive your heel towards the floor, holding this position for as long as you can, preferably around ten seconds.
- Switch sides.
It’s a very similar position to a reverse lunge, except we want to focus on keeping the “down” knee at a 90-degree angle rather than straight back behind you.
This move might sound simple, but it can be a real challenge. Keep practicing the squat hold until you’re able to keep yourself balanced, and you can hold the position for ten seconds on each side.
Moving on Up: Bodyweight Split Squats
Once you’ve mastered the squat hold, you can start actually performing the split squat. You may want to put a pad or pillow under you to avoid banging your knee into the floor, especially until you become more comfortable with the movement. The bodyweight split squat is the basic movement you’ll use for subsequent variations.
To do a bodyweight split squat:
- Put yourself into the squat hold position. Start with your left knee “down” and your right knee “up.”
- Using the strength of your right leg, lift your body straight up until your right knee has a slight bend and your left leg is nearly straight. Keep the toes of your left leg rooted on the ground.
- Slowly bring your body back down, making sure your left knee does not touch the floor.
- Repeat for the desired number of reps, then switch sides.
Once you master the movement with no bells and whistles, you’re getting even closer to finally being able to complete more advanced variations of the split squat.
The Big Finish: Advanced Split Squat Variations
You know you’ve mastered an exercise when you can start mixing things up a little bit. When it comes to the split squat, there are two main ways you can make the movement more challenging:
Of course, if you’re really feeling confident, you can elevate your leg and add some weight. The big thing to remember is that you never want to sacrifice your form just to make things more challenging. If it’s too difficult, always remove weight or decrease your range of motion rather than improperly completing the exercise.
Contrary to popular belief, squats don’t make your knees hurt. However, an improper squat form can make your knees hurt, so you want to make sure you’re completing these movements properly. In fact, a good squat form can reduce your risk of knee injuries.
Additionally, you can incorporate upper body movements into the split squat. For example, try doing a shoulder press with your dumbbells when you reach the apex of the squat, or you can try using a medicine ball and do a front chest press before you bring your body back down.
Why are Split Squats Important?
Many people skip leg day at the gym because most people are more concerned about the physical results of upper body workouts. Here’s the thing: working out isn’t just about looking your best. It’s also about letting you feel your best in the safest way possible.
When you perform a split squat, you’re working out a number of muscles all at one time. Like any squat, your quadriceps on the front of your thighs are getting most of the attention. However, it also helps build up and strengthen your hamstrings on the backside.
By getting into the more advanced variations that involve elevating one leg or adding weight, you also start working a little bit of your core as it works to keep your body straight and aligned.
Not to mention, a benefit that split squats have over regular squats is that they can help you improve your balance. When you’re just starting out, it’s normal to feel a little bit clunky and off-kilter. But the more you practice, the more you’ll be able to maintain stability during your workout.
This can help you during athletic competitions to keep yourself balanced, but it’s also a great way to enhance your yoga moves that require perfect equilibrium.
Using the Gorilla Bow for Split Squats
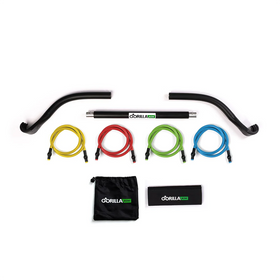
Resistance training has no bounds, and split squats are practically begging to be amplified with the Gorilla Bow. One of the best ways that you can incorporate the Gorilla Bow into your split squat is by putting one leg on the resistance band and then keeping the bar along the back of your shoulders and neck.
Then, as you lift your body up, the resistance from the Bow will make it more difficult, helping to strengthen your legs to an even more significant extent. Consider pushing the Bow upward for a shoulder press at the apex of your squat.
Additionally, you can put the resistance band portion behind your neck and hold the Bow out in front of you. This lets you do a chest press or decline press after you bring your body up.
The Cool Down
Lower body exercises are necessary for holistic wellbeing. The reason that so many people skip leg day might have to do with the fact that they’re so bored with the same old exercises. This is where a split squat can help breathe new life into your typical routine.
Split squats are unilateral movements that work the same muscle groups as a regular squat. However, they’re a bit more challenging. Start off slow by holding the position, but then work your way up towards using body weight to complete the entire movement.
When you’re ready, you can try adding some weights, elevating one leg, or combining the two together. You can even try incorporating upper body exercises like chest presses or shoulder presses.
Split squats are essential for toning your quads and hamstrings while also giving you a boost to your sense of balance. Take your split squat game to the next level by incorporating the original Gorilla Bow into leg day, arm day, chest day -- every day.
Sources:
Next post Biomechanics of the Squat: A Deep Dive Into The Exercise Science | NASM


Leave a comment